About me

My top tips on how to make a house a home with simple, innovative ideas and a sensible budget.
Visit my store to view and order custom word art.

Sunday, 19 May 2013

Grey birds - May 2013

GREY BIRDS - MAY 2013

Owl will always love you....

Birdie!

This was my five minute craft deal this weekend. We dropped off some stuff at the charity shop on Saturday, and while I was in there I remembered this pin on pinterest. So I thought I'd do my own version. Unfortunately I forgot to take a before shot (again! grr) but the little owl was glass and the bird was this horrid turquoise/black spray weird effect. (you can see it coming through here:

When my husband saw them I think he thought I'd gone mad. They cost me £3 and I think they look cute now - they'll match the nest of tables as I used the same spray paint (post on that to follow once they are finished)


Shoe shelving in the cupboard - May 2013

SHOE SHELVING IN THE CUPBOARD - MAY 2013

Apologies in advance, this isn't a crafty fun post, more of an organising my house post. The cupboard over the stairs in our room was a higgldey-piggldey mess, and I've wanted to put up the shelves for quite some time in there,  but it's quite a big project. I finally summoned up the energy to do it today, and here's how!

First I worked out the heights of our shoe boxes and put guidelines on the wall with gaps big enough for the boxes. Next I measured across to see what the width of the shelf would need to be and worked out what the depth would be good front to back. The trick here is to get the balance of having them deep enough to hold the boxes fine, but not too deep that it's awkward to get them on the shelf, bearing in mind this was a built in cupboard. My shelves were 35cm deep and 98.5 wide - the gap was 99 so I gave a .5cm tolerance. 

In the old house we had loads of Pax wardrobes from Ikea, but I didn't need them all in the new house (built in wardrobes - yes!). So for the shelves I took two side panels and sawed them to the right size. This. was. exhausting. especially as it was warm out there today. One day I'll have a circular saw and it'll take one fifth of the time... but alas not yet!

I also used bit of left over wood I had lying about (although my reserve of scrap wood is running very low now!) as batons.

So - here's how I did it:

1. Draw guidelines on the wall where you want your shelves (I forgot to take a picture before I any batons up - sorry! but you can see them in the pictures below). Make sure you use a spirit level for this.

2.  Measure the depth of the shelf (2cm) down from my guidelines, and that's where the top of the baton needs to be.

3. Drill a pilot hole through the wood and a little through the wall. This gives you where you need to put the raw plug in. 

4. Put the raw plug in the wall


5. Put the screw through the wooden baton and into the wall, don't tighten it too tight yet though.

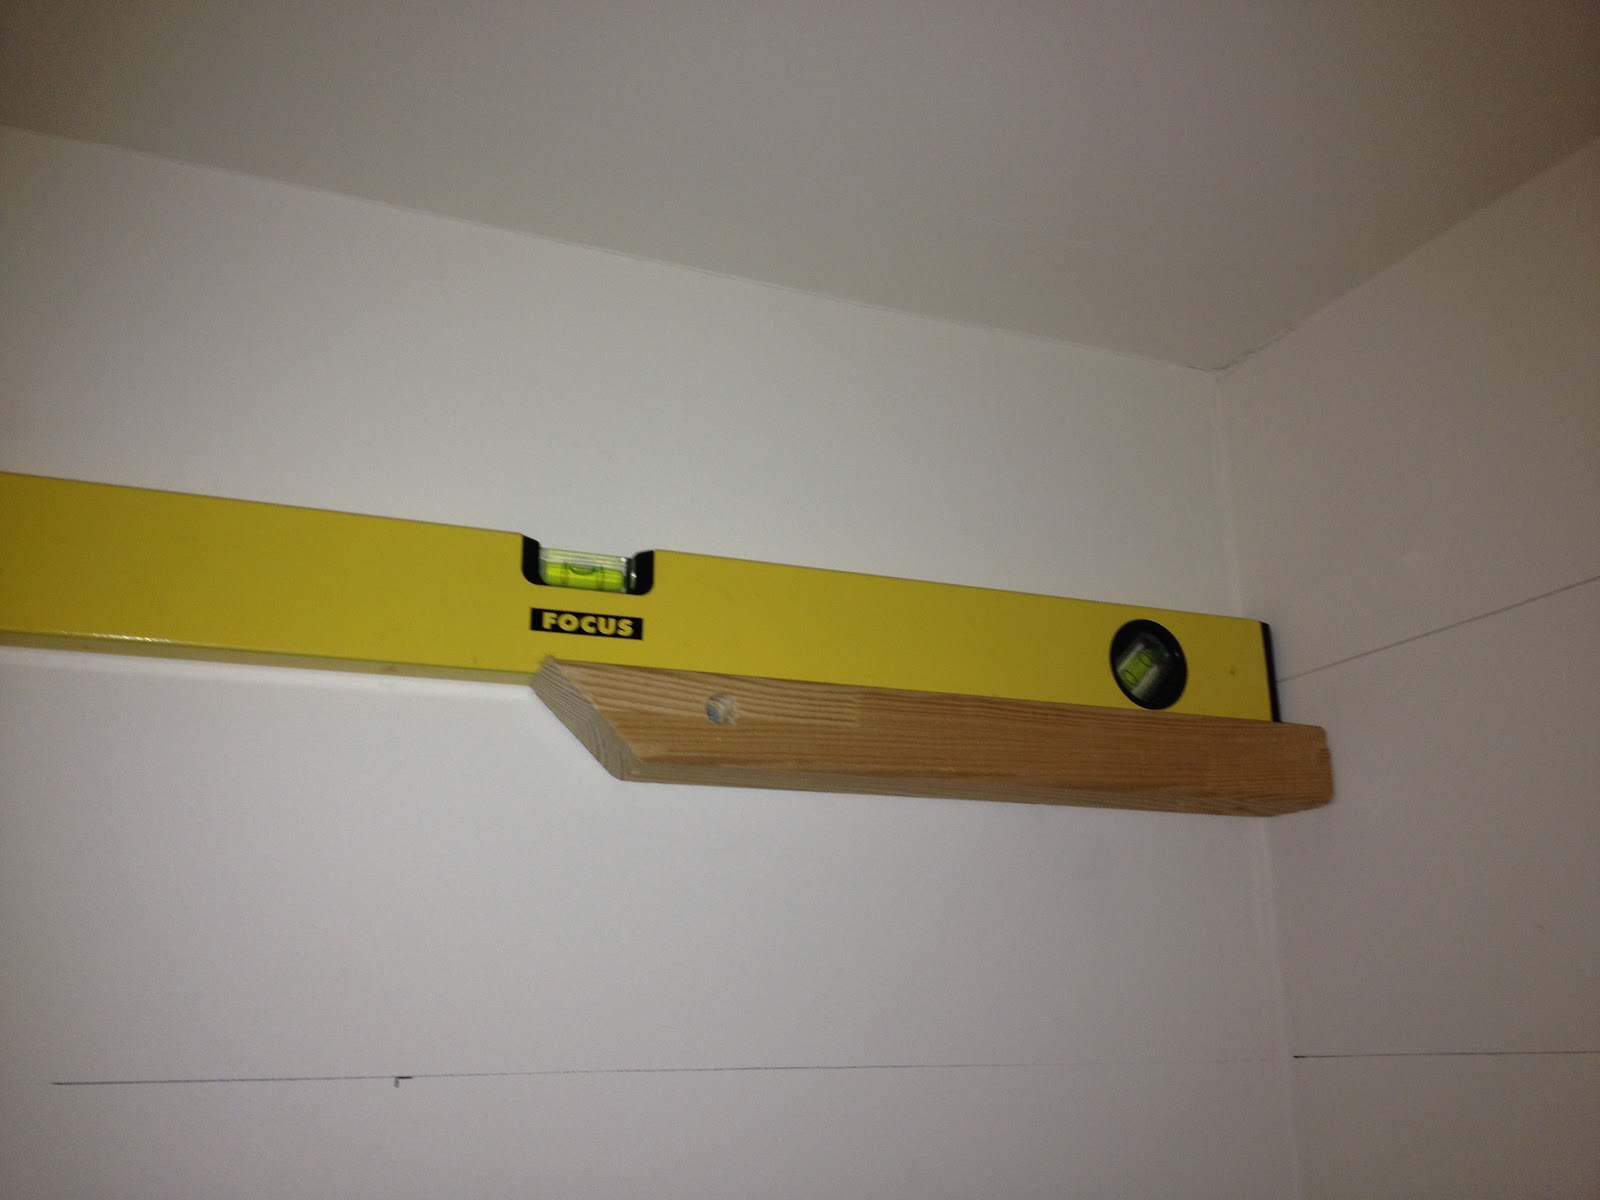
6. Lay a spirit level on top of your baton and make sure it is level while repeating steps 3-5 for the back hole - you can tighten both screws now.


And you just keep going till all the batons are up. Some of my batons were too thick for my screws so I had to do a countersink about 2cm deep! But is seemed to work ok.

Another tip if you have limited baton wood is to cut them at a 45 degee angle when sawing them up, you save about 6cms doing it this way, which was just enough for me! (you can see this on the leading edge of the batons below if you look carefully)

So here are the photos:

Coming along nicely:


And here they are in all their glory:

So glad that job is jobbed - I can put the workmate down in the garage out the way now.

I'm off for ice cream! ;)

Tuesday, 14 May 2013

An eggstremely good idea - May 2013


AN EGGSTREMELY GOOD IDEA

OK, so strictly speaking not my idea, but my Dad's, and like all good ideas it's a simple one.  When you buy new eggs but still have old ones in the basket, draw faces on the old ones so you can quickly identify which need to be used up first.


Cool eh?! Well done Dad!

Saturday, 11 May 2013

Butterfly Lantern - May 2013

BUTTERFLY LANTERN - MAY 2013

This was actually really simple. I did have to buy the butterfly craft punch (£10 from Hobbycraft) but I will use it again, and I could have cut out hearts instead.

This was actually inspired by... you guessed it, Pinterest. But thought it'd go really well in my step-daughter's room.

So, first, use the stamp (or hand cut a simpler shape) to cut out your butterflies, then colour them in with a sharpie. Finally - fold your butterfly either side of it's body section so the wings point up at an angle.

Here they are all finished:

Then I took a boring ikea lantern lampshade and glue gunned them to the shade, working from the bottom up in a random cluster pattern:

Then I hung the lantern in her room, I think they look ok... If I was doing it again I'd use a cream shade lantern, but oh well, some day I'll redo it!


Friday, 10 May 2013

Mr G. Raffe height chart - 2011

MR G. RAFFE HEIGHT CHART - 2011

So a while back I was feeling like my step-daughter was growing at an alarming rate. I wanted to record her height but I knew we wouldn't be in our old house forever, so I didn't want to record her growth on the wall, it needed to be transferable. So I thought I'd have a go at painting a height chart. 


I searched online for pictures of giraffes that were cartoon, but not too clipart-y. I found one and then did a freehand version in pencil first. I just used half a sheet of mdf. Then I painted away and this was the outcome!

Monday, 6 May 2013

Lamp post - May 2013

LAMP POST - MAY 2013

First let me say... I love lamp. I love carpet.


So I was round my folks' one day and saw an old lamp was by the front door. I asked if they were throwing it out, and if so could I have it? Yep - it's just going to the dump. As my Mum said, she'd had it 35 years and had enough of it... hmmm. So it was an ugly fuggly lamp cos it was brass, and not very shiny, it looked dated. Anyway, I had some spray paint so 5 minutes work and I have a scrummy lamp. I grew up with it in the house so it's nice to give it a new lease of life, and to get a free lamp! 

Here it is in situ in the nicely-coming-together guest bedroom - it needs a new shade, but this is one I had lying around and will do for now.


Hooked on ironing boards - May 2013

HOOKED ON IRONING BOARDS - MAY 2013


I saw this idea on Pinterest and thought it was a great solution to not have the ironing board fall over on me in the utility room, especially as little one grows up. Growing up my folks used elastic and a big hook to keep their on the wall, but thought this was cuter.

Obviously ironing boards are pretty heavy, so I took four raw plugs and popped them in the wall (the fifth place I wanted to put one had a stud behind it, so I could screw straight into that one). I drilled five corresponding holes into the wooden baton I had. Then got a bigger bit and drilled about .5cms down (I'll explain why in a moment). Then I fixed the baton to the wall and hid the screws by filling the holes with polyfilla. Then I painted it with white emulsion and had to wait 30 minutes for that to dry. The I took my two hooks (which I had planned to use as coat hooks in my old house but never got round to using) and screwed them into the baton. Simples!

So mine doesn't have the pretty frame around it, but I might add embellishments later on. Or maybe not as it's going to be hidden behind a curtain I'm planning to get to separate the utility from the kitchen (washing machines and driers are so noisy!